
You can fix a dyson vacuum not charging by first checking that the wall outlet has power and the charger is pushed firmly into both the machine and the wall. If your vacuum still fails to show a light, the most common cause is a dirty contact point or a power supply issue.
Why your vacuum won’t hold a charge
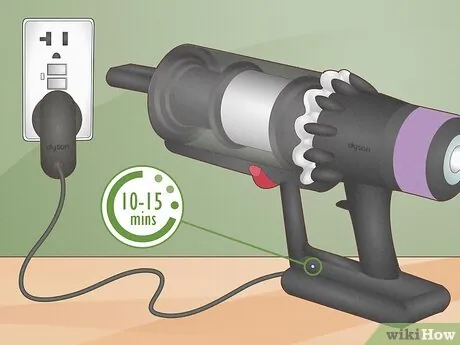
The primary reason for a power issue is often a simple connection failure between the charger and the battery. If the metal pins on the charger or the port on the machine are covered in dust or debris, the electrical current can’t pass through. You can usually resolve this by cleaning these areas with a dry, soft cloth.
Another common cause involves the thermal protection system inside the battery. Dyson batteries are designed to stop charging if they’re too hot or too cold, which helps prevent long-term damage. If you have just finished vacuuming a large area or used the device in a very cold garage, the battery might be outside its safe operating temperature range. It needs to sit at room temperature for at least 30 minutes before it will resume the charging process.
Finally, the charger itself might have an internal break. While these power bricks are reliable, the thin wires inside can fray if the cord is wrapped too tightly around the unit during storage. If the LED light on your charger remains dark even when plugged into a known working outlet, the charger likely requires a replacement. Dyson official support provides specific guidance on identifying light patterns that indicate whether the fault lies with the battery or the power supply.
Clean the charging contacts and ports
This fix is for users who see no light at all when they plug in their machine. Before you start, always unplug the charger from the wall to avoid any risk of a short circuit. Use a dry, lint-free cloth to gently wipe the metal contacts on the end of the charger plug and the corresponding port on your vacuum handle.
If you see visible grime, use a dry cotton swab to reach inside the port, but don’t use any liquids or metal objects like screwdrivers. Metal tools can scratch the delicate contact points or cause a spark, which ruins the port permanently. If the port feels sticky or shows signs of corrosion, don’t force the swab; you may need to use a blast of compressed air to dislodge deep debris.
Once you have cleared away the dust, plug the charger back into a wall outlet that you know works, such as one you have tested with a lamp. If the light on the vacuum or the charger turns on, you have solved the problem. If it stays dark, try a different wall outlet in another room to rule out a tripped circuit breaker.
This process assumes the vacuum isn’t currently mounted to a wall dock. If it is, take it off the dock and plug the charger cable directly into the vacuum port to bypass the wall mount. If the light appears only when you bypass the dock, the issue lies with the dock’s internal wiring rather than the vacuum itself. In that case, check the dock’s own power cable for fraying or loose connections.
Reset the battery connection
If the machine still refuses to charge, you may need to reseat the battery pack. This is only for models with a removable battery, which you can identify by the screws or the release button near the handle. If you have a model with a fixed battery, don’t attempt to open the casing. Doing so voids your warranty and poses a risk of electrical shock.
To reseat the battery, locate the screws or release button on the underside of the handle. Carefully slide the battery out of the unit, wait about 10 seconds, and then slide it back into place until you hear a firm click. This action forces the internal pins to re-align, which sometimes fixes communication errors between the battery and the motor.
Check the contacts before you reinsert the pack. If you see dark, carbon-like buildup on the metal pins, wipe them gently with a dry, lint-free cloth. Don’t use water or liquid cleaners, as these can cause permanent corrosion.
After you have reseated the battery, plug the charger directly into the vacuum. If the battery was simply misaligned, the charging light should blink or turn solid almost immediately. If you have a spare battery, swap it now to see if the vacuum responds.
If the machine charges with the spare, your original battery has likely reached the end of its life. A battery that fails to hold a charge after a full cycle is usually suffering from internal cell degradation and requires a full replacement.
Check for airflow and temperature issues
This fix applies when the vacuum shows a charging light but never reaches a full charge. A vacuum running on “Boost” or “Max” settings for more than ten minutes heats up significantly. Internal sensors block charging until the unit cools. If the casing feels warm to the touch, place the device in a cool, dry area away from direct sunlight for at least two hours.
Check your filters and bin for blockages. A hidden clog in the wand or brush head forces the motor to work harder, which drains the battery faster than the charger can replenish it. If you have a HEPA filter, rinse it under cold water and let it air dry for at least 24 hours. Placing a damp filter back into the housing can cause mold growth and damage the motor.
If the machine fails to charge after cooling and clearing clogs, the battery management system may have entered a permanent lockout state. This requires professional diagnosis, so please contact a qualified technician to inspect the internal components.
At this point, the battery can’t be repaired by the user. Attempting to bypass the management board is a fire hazard that voids your warranty. If the unit remains unresponsive after a full cooling cycle and a clean filter installation, the battery has reached its end of life. You must recycle the pack according to local electronic waste regulations.
Common mistakes to avoid
Using third-party chargers often bypasses the voltage regulation built into original equipment. This oversight causes internal circuitry to overheat, which permanently degrades the battery’s capacity within weeks. If the charger lacks an official certification mark, discard it immediately.
Storing your vacuum in direct sunlight or a hot car accelerates chemical breakdown. Lithium-ion cells suffer irreversible damage when temperatures exceed 110 degrees Fahrenheit. If you notice the casing feels hot to the touch after storage, move it to a climate-controlled room to prevent total cell failure.
Leaving the battery at zero percent for more than three months triggers a deep discharge state. Once the voltage drops below a critical threshold, the internal safety circuit locks the battery to prevent fire, rendering it a brick. Always maintain at least a 40 percent charge during long-term storage.
If the charging plug resists, stop pushing. Forcing a connection bends the delicate pins, which prevents the electrical connection.
How to keep your vacuum charging properly
To keep your machine running, you should prioritize storing it in a cool, indoor environment rather than a garage or shed where temperatures fluctuate. A steady room temperature helps the lithium-ion battery stay healthy.
Wait for the unit to cool before plugging it in to charge. Charging a warm battery triggers thermal protection, which forces the device to reject the current. Consult your owner’s manual for specific maintenance guidance, as optimal service intervals depend on your individual usage.
Always plug the charger directly into a dedicated wall outlet. Power strips often fail to deliver the consistent voltage required for high-draw appliances, leading to incomplete charging cycles. If your indicator light blinks red instead of solid blue, move the plug to a wall socket immediately.
Coil the charging cord loosely in a wide circle. Wrapping it tightly around the base creates internal wire fatigue, which eventually severs the connection. You can tell if the cord is damaged by checking for stiff spots or exposed housing. If you feel a kink, stop using it; a frayed wire is a fire hazard that can also short-circuit your charging port.
Frequently asked questions
How long does a dyson battery take to charge?
Most models take 3.5 to 5 hours to reach a full charge when using the original wall charger. This duration depends on your specific battery capacity. If charging takes significantly longer, the battery may be nearing the end of its life.
Is it safe to leave my dyson plugged in all the time?
It’s safe to leave your vacuum plugged in because the internal battery management system stops power flow automatically. The system prevents overcharging when using the official charger. Unplug the unit if you’re away for an extended period to save energy and protect against surges.
Why does my vacuum light blink red?
A blinking red light indicates a battery fault or connection error preventing operation. Try reseating the battery to see if the error clears. If the light persists, the battery pack likely has a failed cell and requires replacement.
How do I know if my charger is broken?
You can tell the charger is broken if the light on the charger brick itself remains dark when plugged into a wall outlet that you know works. If the charger light is off, no power is moving to the vacuum. You should never attempt to open the charger housing to fix internal components, as the capacitors inside can hold a lethal electrical charge even when the unit is unplugged from the wall.
Can I use a different charger if mine is lost?
No, you should only use an original charger designed specifically for your model, as other chargers have different voltage outputs that can permanently damage the battery. Using a generic or mismatched charger is a common way to trigger a permanent safety lockout in the battery. If you have lost your original charger, purchase a replacement directly from the manufacturer to ensure it matches the technical specifications of your vacuum.
Conclusion
If these simple checks don’t get your machine running again, don’t worry. It’s likely time to reach out to the manufacturer’s support team for a professional assessment. They’ll help you determine if you need a replacement battery or a new power cord, so you won’t be stuck with a messy floor for long.