
You can install a belt on a Kirby vacuum by using a flat-head screwdriver to release the tension on the nozzle. This job is medium difficulty, as it requires grip strength to stretch the new belt over the motor shaft. Use the Kirby official owner manual to identify the correct replacement part for your specific model.
Necessary items for belt replacement
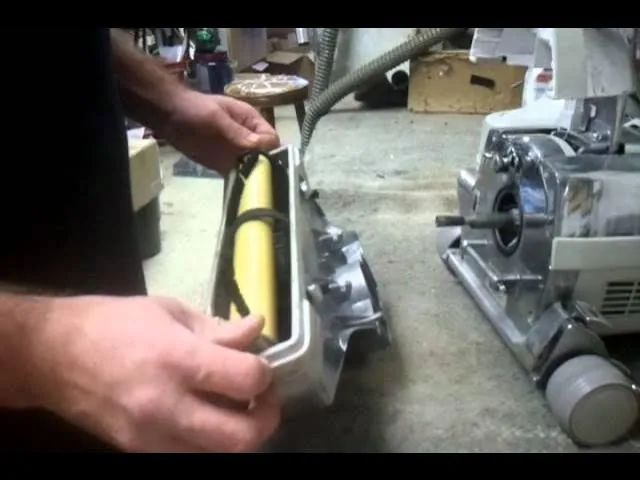
| Item | How much | Why it’s needed | A substitute |
|---|---|---|---|
| Replacement belt | 1 unit | Required for drive | none — don’t swap this |
| Flat-head screwdriver | 1 tool | Releases nozzle tension | Butter knife |
| Soft cloth | 1 piece | Cleans motor shaft | Paper towel |
| Work gloves | 1 pair | Protects from heat | None — use care |
Verify your belt part number against the manufacturer’s stamp before opening the housing. If the new belt is even one millimeter too wide, it will fray within hours of operation.
Use a magnetic-tip screwdriver to prevent screws from falling into the internal gear assembly. Retrieving a dropped screw from the motor housing often requires a complete teardown of the chassis.
If you feel significant resistance while prying the tensioner, stop immediately. Applying excessive force here frequently snaps the plastic mounting clips, which aren’t sold as individual parts. If the tensioner doesn’t yield, apply a single drop of penetrating oil to the pivot point and wait five minutes.
Always unplug the power cord before touching the motor shaft. Residual static electricity can trigger a sudden motor pulse, posing a serious risk to your fingers while you’re cleaning the shaft.
Preparing your vacuum for maintenance
- Unplug the vacuum power cord from the wall outlet completely before you touch any internal parts. Always unplug the vacuum power cord from the wall outlet before touching any internal parts to ensure the motor can’t be energized.
- Empty the dust bag or canister to reduce the total weight of the unit. This makes it easier to maneuver the vacuum while you’re working on the floor nozzle.
- Place the vacuum on a flat, hard surface like a table or a workbench. You should never attempt this on a carpeted floor, as you’ll lose small screws or parts in the fibers.
- Check that the height adjustment dial is set to its highest position. This gives you more space to reach the belt area without the nozzle housing getting in your way.
- Consult a professional repair shop if the motor shaft is bent or the plastic housing is cracked. These issues require specialized tools and parts that aren’t part of standard home maintenance.
Steps to install your Kirby vacuum belt
- Turn the nozzle lock lever on the front of the unit to the unlocked position. Pull the nozzle assembly away from the main body of the vacuum until it detaches completely.
- Locate the belt guard on the underside of the nozzle. Use your screwdriver to turn the two locking screws a quarter-turn counter-clockwise to release the guard plate.
- Remove the old, stretched, or broken belt from the brush roll and the motor shaft. If the belt has snapped, ensure you remove all rubber pieces from the shaft.
- Wipe the motor shaft clean with your cloth to remove any burnt rubber residue. A clean shaft prevents the new belt from slipping or wearing out prematurely during use.
- Slide the new belt over the brush roll first, ensuring it sits in the center groove. Make sure the writing on the belt faces away from the brush roll.
- Stretch the belt toward the motor shaft area while holding the brush roll firmly in place. Use the screwdriver as a lever if you can’t stretch the belt by hand.
- Loop the belt onto the motor shaft, ensuring it sits flat and isn’t twisted. A twisted belt will cause vibration and can melt the plastic components.
- Replace the belt guard plate and lock it by turning the screws clockwise. Attach the nozzle back to the vacuum body and lock the lever to secure it.
Signs of success and maintenance
A successful installation means the brush roll spins freely and maintains high speed while the motor runs. You should hear a consistent, low-pitched hum without any high-pitched squealing sounds. If you hear a loud, rhythmic slapping noise, the belt is likely twisted or not seated correctly in the motor shaft groove. You must stop the motor immediately if you hear this, as a rubbing belt creates friction heat that can melt the nozzle housing.
Test the suction by running the vacuum over a small patch of carpet. If the brush roll doesn’t turn or the vacuum feels heavy to push, the belt might be too loose or the wrong size for your specific model.
Check the belt tension by pressing down on the center of the belt; it should have a small amount of “give” but feel firm. If the belt is too loose, it will slip and fail to pick up debris, often leaving a burning rubber smell in the air.
Look for a clean, even line of agitation on the carpet fibers. If the path looks uneven, the brush roll is likely misaligned or one end is stuck. Replace the belt based on your frequency of use, following the guidelines in your owner’s manual. If the belt looks glazed or shiny on the inside, it’s slipping and needs immediate replacement.
Troubleshooting common belt issues
| What happened | Why | What to do |
|---|---|---|
| Belt keeps snapping | Debris in brush | Clear hair and string |
| Squealing noise | Belt is loose | Check shaft alignment |
| Brush doesn’t turn | Belt is off | Re-seat the belt |
| Burning rubber smell | Slipping belt | Replace the belt |
| Nozzle won’t lock | Debris in latch | Clean the latch |
If your belt snaps repeatedly after you clear the brush, check the bearings. Worn bearings force the motor to work harder, creating enough heat to melt the rubber. If the belt feels loose but the shaft is aligned, the belt has likely stretched beyond its elastic limit.
A common mistake is applying lubricant to a squealing belt. This ruins the friction required for the drive system and necessitates an immediate replacement. If the belt slips only when you move from carpet to hardwood, adjust the height setting. A setting too low creates excessive drag.
Use this rule: if the belt shows visible cracks or fraying, replace it regardless of how it performs. If the belt looks pristine but slips, clean the drive pulley with isopropyl alcohol to remove accumulated wax. If the belt remains loose after cleaning, the tension spring has failed and requires a professional repair.
How often to replace your vacuum belt
You should replace the belt every 6 to 12 months for optimal cleaning performance. The actual interval depends on how many hours you use the vacuum each week and the type of flooring in your home.
If you have multiple pets or long-haired family members, replace the belt more frequently. Hair wraps around the brush roll and adds resistance that stretches the rubber prematurely; consult your owner’s manual for the recommended service schedule based on your specific usage.
Always inspect the belt for cracks or thinning whenever you change the vacuum bag. If you notice the edges of the belt are fraying or the rubber looks dry and brittle, replace it immediately regardless of how many months have passed.
A simple test confirms if the belt is failing: place a piece of white paper on the floor and run the vacuum over it. If the machine fails to leave a clean path or you smell burning rubber, the belt is slipping.
If your vacuum has an adjustable height setting, keep it at the highest level for thick carpets. Using a low setting on deep pile carpet forces the belt to work against excessive friction, which can snap a new belt in under an hour.
Frequently asked questions
Can I use a generic belt for my vacuum?
You should only use a belt specifically recommended for your Kirby model to ensure proper tension and durability. Generic belts often differ in thickness or elasticity, which can lead to motor strain or poor cleaning performance. You can verify the correct part number by checking the label on your vacuum or looking up your serial number on the manufacturer’s official website to avoid damaging your machine with an incompatible part.
Is it safe to replace the belt myself?
It’s safe to perform this task if you keep the unit unplugged during the entire process. Never attempt to bypass safety features or use metal tools to probe inside the motor housing while the unit is plugged in. If you feel unsure about handling the internal parts or if you encounter resistance that feels abnormal, take the unit to a certified repair technician to avoid voiding your warranty or causing injury.
How long does a vacuum belt last?
A belt typically lasts about 12 months under normal household use. This estimate assumes weekly vacuuming of a standard home on medium-pile carpet. If you use the machine daily or on high-pile rugs, the rubber will degrade faster.
What happens if I use the vacuum with a broken belt?
The vacuum will continue to provide suction, but the brush roll won’t agitate the carpet fibers. This means you’ll lose the ability to remove deep-down dirt and pet hair, making the vacuum significantly less effective at cleaning. Furthermore, if the broken belt remains inside the housing, it could potentially snag on the motor shaft and cause damage to the internal plastic components or the motor itself.
Does it matter which way the belt faces?
Install the belt with the writing facing away from the brush roll to ensure proper function. This orientation also makes the part number easy to read for future replacements. Always ensure the belt isn’t twisted during installation, as twists create uneven pressure that leads to rapid wear or snapping.
Why is my new belt making a loud noise?
A loud noise immediately after installation usually means the belt is twisted or not centered on the motor shaft. Stop the machine right away to prevent the heat from melting the plastic parts. Open the nozzle housing again, verify that the belt is flat in the groove, and ensure that no debris is preventing the brush roll from spinning smoothly. A properly seated belt should run quietly.
Conclusion
Once the nozzle is securely back in place, take a moment to test the vacuum on a small patch of carpet. If it glides smoothly and the brush roll spins freely, you’ve done a great job. Don’t forget to check the belt again in six months to keep your floors spotless.